
So my friend Robert told me that he was getting back into 40k. After a chat we decided that with some of my models he could field a force and we should get in a game. I have been playing a foot Eldar list while I await the Necrons. Its a blast to play and a nice change of pace after playing DE for the last year.
So here is my list.
Mission: Capture and Control with Spearhead deployment
Eldar 1500
Eldrad
Avatar
9 Harlequins inc shadowseer
11 Guardinans w/shuriken cannon
10 Dire Avengers inc exarch w/ 2 catapults and bladestorm
3 jetbikes one w/shuriken cannon
5 Rangers
2 wraithlords brightlance and EML
3 warwalkers w/ scatterlasers
Tau 1500
1 Commander Shas'o Hard-wired Drone Controller; 2 Gun Drone; Missile Pod; Plasma Rifle; Multi-
6 Fire Warrior
1 Devilfish Burst Cannon; Landing Gear; Disruption Pod; Multi-Tracker; Targeting Array; Smart Missile System)
6 Fire Warrior
1 Devilfish Burst Cannon; Landing Gear; Disruption Pod; Multi-Tracker; Targeting Array; Smart Missile System)
10 Kroot Carnivore Squad
1 Hammerhead Gunship Targeting Array; Smart Missile System; Disruption Pod)
1 Broadside Battlesuit Bonding Knife; Hard-wired Drone Controller; Hard-wired Multi-tracker; Hard-wired Target Lock; Twin Linked Plasma Rifle;2 Shield Drone; Advanced Stabilisation System; Team Leader)
1 Broadside Battlesuit Smart Missile System; Advanced Stabilisation System)
1 Broadside Battlesuit Bonding Knife; Hard-wired Drone Controller; Hard-wired Multi-tracker; Hard-wired Target Lock; Twin Linked Plasma Rifle;2 Shield Drone; Advanced Stabilisation System; Team Leader)
1 Broadside Battlesuit Smart Missile System; Advanced Stabilisation System)
1 Crisis Battlesuit Bonding Knife; Fusion Blaster; Missile Pod; Targeting Array; Team Leader) 1 Crisis Battlesuit (Fusion Blaster; Missile Pod; Targeting Array)
1 Crisis Battlesuit (Flamer; Missile Pod; Targeting Array)
1 Crisis Battlesuit Bonding Knife; Twin Linked Missile Pod; Blacksun Filter; Team Leader)1 Crisis Battlesuit (Twin Linked Missile Pod; Blacksun Filter)
1 Crisis Battlesuit (Twin Linked Missile Pod; Target Lock)


the Tau deployed the suits with missiles and fusion on the left, and the twinlinked missiles in the center. One unit of broadsides control the building(where his objective is) and the other is on the left.
Turn one
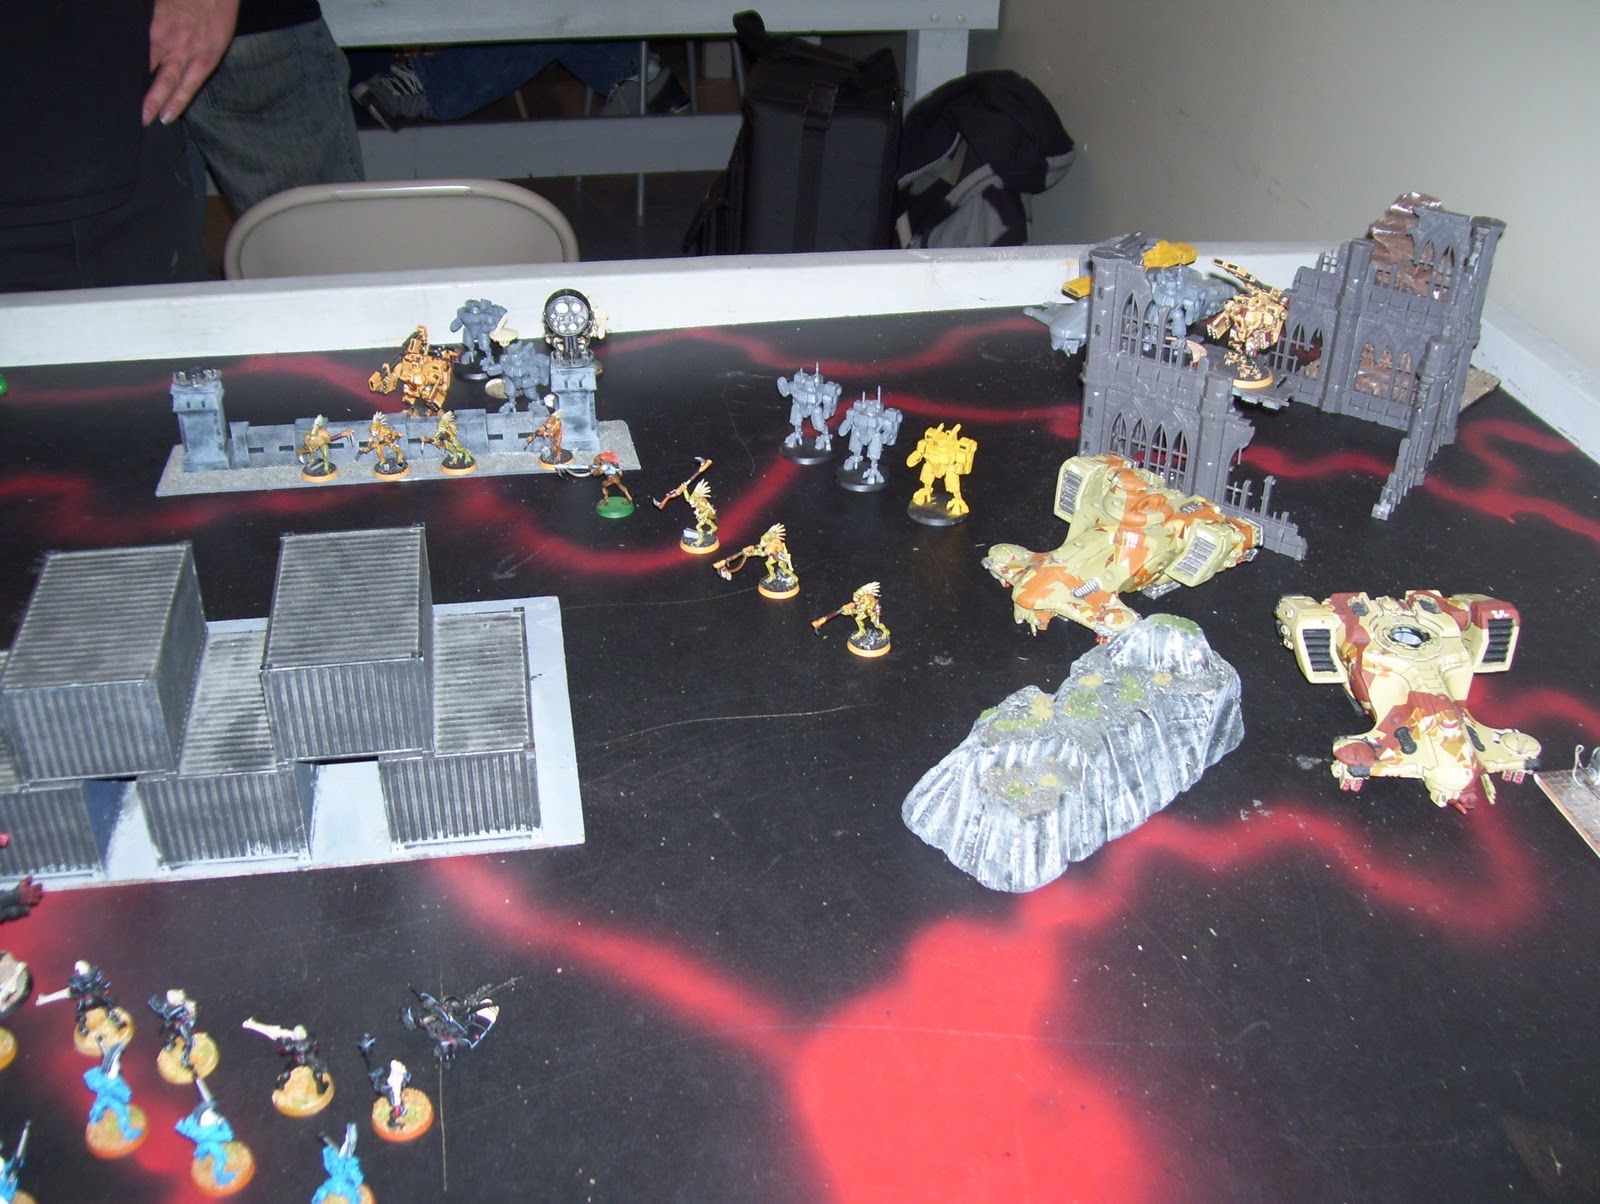
I move around the left side of the containers with my heavy hitters. I end up dropping two of the suits in the crisis squad on the left. My guardians and avengers manage to drop two kroot. My jetbikes turbo boost along my right flank in hopes of putting pressure on his objective late game.
His turn his dice went hot with him killing a bunch of models. His first shot explodes a warwalker and killing 4 other eldar along with it. The railhead fires a submunition round at the rangers killing two. His crisis suits just pour fire into my two remaining walkers wrecking one immobilizing the other causing it to wreck as well. by the time his shooting was over I had lost all this.

While that may not seem like alot it represent a huge chunk of firepower. And considering that my whole army was behind cover it was a bit demoralizing. Fortunately though all models except the rangers were fearless due to the Avatar.
Turn Two

On Roberts turn his crisis unit on the right see past the veil of tears and are able to pop 3 harlequin. His mobile devilfish moves around the building to fire at my jetbikes, but due to their evasive manuevers he fails to kill any. With nothing better to shoot at the broadsides and crisis on the left target and kill another ranger even going to ground with a 2+. At this point the rangers are down to two models. His other broadsides target the Avatar and fail to hit. His railhead fires a submunition round and kill a few more guardians.
Turn 3
At this point my firepower starts to take its toll. I manage to kill a suit and put a wound on another in his right crisis squad. My jetbikes turbo again to the back corner of the objective building. My Wraithlord and Avatar break cover and lay down fire. The harlies bound over the rock formation and slam into the fish that had been stunned the previous turn. A bunch of dice are thrown resulting in several 6s turning the once proud tau warmachine into a towering fireball. One harlequin is caught in the blast while 3 firewarriors perish in the inferno. The pass their pin check but fail their break test and flee.

Turn 4
The rest of the game begins to proceed quickly as I dont have much choice but to throw my entire army at the objective. I move my bikes along the building to shoot and kill 2 firewarriors preventing them from having any chance to rally. The harlies charge the broadsides killing a drone and losing one of the number in return stalemating the combat.


Turn 5
My jetbikes take the plunge and jump into the building close enough to control the objuective should the broadsides die. A wraithlord and the avenger all move up to the building to pour shots into the "Doomed" broadsides. (like what I did there?) My shooting goes well and the ruin is empty of tau except for a few scraps of smoking yellow armor.
Roberts turn he moves his hammerhead up to contest the objective taking some shots that put more wounds onto a wraithlord. Two suits move up in front of the hammerhead in hopes of blocking a charge or at worst forcing the wraithlord in charge range to shoot the suits ruining its charge against the vehicle. Robert rolls to see if the game ends but it does not. (allowing me a chance to win)
Turn 6
I jump my bikes behind the railhead and move a wraith lord right up to the hammerhead. The back wraithlord kills both suits in the way, and the other wraithlord and the jetbikes fail to damage the railhead. the wraith lord charges in and hits twice, auto pen, and then I roll a 5 for the damage result. Here is Robert showing the status of his vehicle.

Post game
This game was REALLY close. Two rolls had to go my way to get a win. I needed a turn 6 and then I needed to pop that railhead. The Tau codex may be old but its firepower is withering to a foot list. Robert is busy getting his own models together, but if you get a chance to play him you should he is a great opponent and a really nice guy.
Well folks this is my first ever battle report so I hope you liked it and I would love to hear feedback on how to make it better.
Thanks for reading
Neil
Dude.
ReplyDeletehey Gary, if Rick posts "sweet" I may have to strangle you both.
ReplyDeleteSWEET!!!
ReplyDeleteI was expecting a different Rick, but the effect is the same. You are both so fired ;)
ReplyDeleteNice BR and gratz on your win
ReplyDeleteDude.....Sweet.....Dude....Sweet.....DUDE!!.....SWEET!!!
ReplyDeleteWhat Neil forgot to mention was that he helped me a lot during turns one and two, until he realized that my dice were rolling hot. Then he suddenly got quiet. I cant imagine why.....
ReplyDeleteWOAH!!!!
ReplyDelete